If you want to know how to install System Center App Controller 2012 or haven't read the other posts in this series, then check out the links below for more information:
Installing System Center App Controller 2012
Cloud Management with System Center - Building a Private Cloud with SCVMM 2012
So, to begin with, here is a high level overview of what is required to connect your App Controller installation to a Windows Azure subscription:
- Obtain / Create either a public or self-signed certificate for authentication
- Add the certificate to Azure as a Management Certificate
- Add the certificate to App Controller with Private Key attached
- Create the connection within App Controller to connect to the Azure subscription
For the purpose of this series, I will be using a self-signed certificate for authentication purposes but would always recommend using a trusted 3rd party CA in a production environment for additional security.
There are a number of ways that you can create a self-signed certificate and none of them are the right or wrong way but in this example, I will be using the IIS Manager on the App Controller server to create the certificate.
Using IIS to Create your Self-Signed Certificate
Open the Internet Information Services (IIS) Manager by typing inetmgr in the Start menu textbox
In the IIS section of the center pane, double-click Server Certificates

Click Create Self-Signed Certificate, and then finish the wizard


Once you have completed the certificate creation wizard, you will see your new certificate listed in the central window 'Server Certificates' window as below


Now that we have our certificate created within IIS, we need to export this certificate as a .PFX file which essentially is your certificate with the private key attached and will be the file needed when creating the App Controller side of the connection
Exporting a .PFX file using IIS Manager
Open the Internet Information Services (IIS) Manager by typing inetmgr in the Start menu textbox and then in the IIS section of the center pane, double-click Server Certificates, right-click the certificate in the center pane, and then click Export.

Select the location for the file, enter the name for the file, and enter the password for the private key

Click 'OK' to complete the .PFX export.
Exporting the .CER certificate file with Certificate Manager
At this point we have our new self-signed certificate added to the Certificate ‘Local Computer\Personal Store’ of our App Controller server (the IIS certificate creation automatially does this) and we have also exported the certificate as a .pfx file which contains the private key of the certificate.
We must now export the certificate again from the personal store but this time we wont be exporting the private key and as such we want to end up with a certificate that ends in a .cer extension.
To do this, open up your Certificate ‘Local Computer\Personal Store’ by clicking on ‘Start’, ‘Run’ then typing ‘mmc’ and clicking ‘Enter’
Now click on ‘File’, select ‘Add/Remove Snapin’ and then double click on ‘Certificates’ from the ensuing list
This now opens up the ‘Certificates’ snapin and it is imperative that you select ‘Computer Account’ from the menu that comes up as below

Once you have selected ‘Computer Account’, click on ‘Next’ and then click ‘Finish’ from the next screen leaving the default selection of ‘Local Computer’ enabled
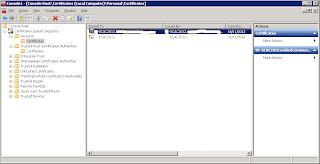
Now you need to expand down to the ‘Certificates\Personal\Certificates’ folder as below and you should see any certificates that have been created and self-signed to this server
To export the certificate as a .cer file with no private key, follow the screenshots below


Make sure you select 'No, do not export the private key' here


You should now have two files on the C drive of your App Controller server, one is a .cer and the other is a .pfx

In the Part 2 of this post I will explain how to import these certificates into Azure and App Controller and also how to then configure the link between the two.
This series of posts also coincide with the new Microsoft Private Cloud Community Evaluation Program starting up and you can sign up at any time to the CEP by clicking on the link below (you will need a Microsoft Live ID to sign in):
No comments:
Post a Comment